When you're diving into the world of solar power for your truck camper, picking the right components is super important. You're gonna want parts that work well together and fit your needs. Let's break it down so you can get started on your solar adventure!
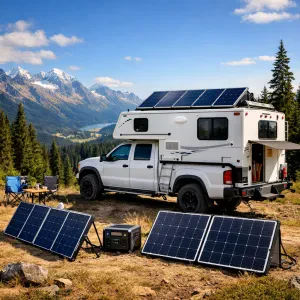
First off, you need solar panels. Consider how much energy you’ll use while off the grid. If you’re running just lights and a fridge, a couple of 100W panels might do the job. But if you plan on running a microwave or other high-drain appliances, you might want to go bigger. Look for panels that are durable and suited for outdoor use. They need to be able to handle the elements, just like your truck camper!
Next, batteries are key for storing all that solar energy. Look for deep-cycle batteries that can handle multiple charge cycles. Lithium batteries are becoming popular because they’re lightweight and last longer, but they can be pricier. If you want a cost-effective option, go for good quality AGM or flooded lead-acid batteries. Just make sure the total capacity matches your energy needs, so you don’t run low when you’re out camping!
Don't forget about the charge controller! This little device regulates the voltage coming from your panels to your batteries. It prevents overcharging and ensures your batteries last as long as possible. MPPT (Maximum Power Point Tracking) controllers are more efficient, but PWM (Pulse Width Modulation) controllers are usually cheaper and work just fine for smaller setups.
Lastly, consider the inverter if you plan to power AC devices. This converts the battery’s DC power to AC power. Make sure you get an inverter that can handle your total wattage needs. Think about what you'll be running and add up those watts. It’s better to have a little extra capacity than to come up short when you're enjoying your time in the great outdoors. With these tips, you're well on your way to knowing how to install solar panels on a truck camper!
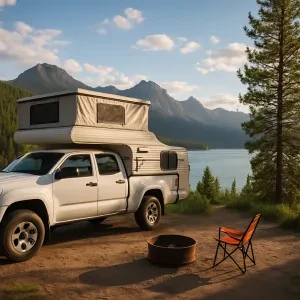
Preparing Your Truck Camper for Installation
Setting up solar panels on your truck camper doesn’t need to feel daunting. First things first: get your camper ready for the installation. You’ll want to start with a good cleaning to ensure the surface where the panels will go is nice and grime-free. Dust and dirt can mess with the adhesive, so grab a bucket of soapy water and a cloth, and give it a good scrub.
Next, check the roof for any damage. If you spot any cracks or weak spots, make sure to patch those up first. A solid roof means a secure installation for your solar panels. Also, it’s a great time to double-check your camper's weight capacity and any electrical systems. You’ll want to ensure everything can handle the new power setup.
Make sure you gather all your tools and supplies before you dig into the installation. Things like a drill, mounting brackets, some strong adhesive, and wiring options will make the process smooth. Don’t forget to have your solar panels on hand too! Familiarize yourself with the installation instructions that come with them so you know what to expect as you work your way through the steps on how to install solar panels on a truck camper.
Lastly, think about the layout. Position the panels in a way that maximizes sun exposure. If you have multiple panels, spacing them out properly is key for efficient energy collection. Take your time with this part; a little planning goes a long way to ensure you get the most out of your new solar setup!
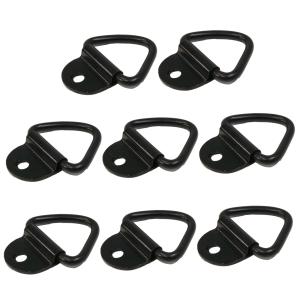
1/4" Steel D Ring Tie Down for Truck Campers
Secure your gear with confidence using this durable steel D ring tie down designed specifically for truck campers
Product information
$18.49
Product Review Score
4.82 out of 5 stars
119 reviewsProduct links
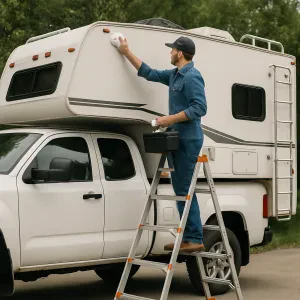
Mounting Solar Panels Safely and Securely
Next up, it's time to prepare the area. Clean the roof thoroughly to ensure the adhesive has a good grip. Use rubbing alcohol for a nice, clean surface. After that, get your mounting brackets or Z-wires ready for action. These will hold your solar panels in place, so make sure they’re compatible with your panel size and truck camper model.
When it comes to attaching the panels, don’t skimp on the quality of your adhesive or screws. Use marine-grade materials if you can; they’re tough enough to handle the outdoors. If you're using adhesive, apply it evenly along the mounting brackets, then lift the panels carefully into place. Press down firmly to create a strong bond. If using screws, drill pilot holes first to prevent cracking your roof!
Final step: double-check everything! Make sure your panels are aligned properly and securely fastened. After that, you can wire them to your battery system. It might seem complex, but it’s just a few connections. This is where you'll see your truck camper come alive with solar energy. By following these steps, you’ll know exactly how to install solar panels on a truck camper, ensuring a reliable power source for all your adventures!
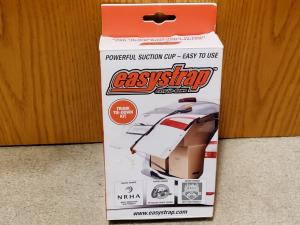
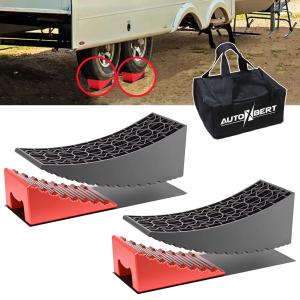
Easystrap Tie-Down Safety Cargo Kit for Campers
Keep your gear secure and your adventures worry-free with this easy-to-use tie-down safety cargo kit
Product information
$42.99
Product Review Score
4.42 out of 5 stars
150 reviewsProduct links
Connecting and Testing Your Solar Setup
Once you've got your solar panels mounted on your truck camper, it’s time to get everything connected and tested. Don’t worry—it’s easier than it sounds! First, you'll need to connect the panels to a charge controller. This device keeps your batteries safe from overcharging and ensures they get the right amount of power.
Start by taking your solar panel wires. You’ll usually have positive (red) and negative (black) wires. Connect the positive wire from the panel to the positive input on your charge controller and do the same with the negative wire. It's pretty straightforward, but make sure your connections are secure. You don’t want anything coming loose while you’re out on the road!
Next, you’ll connect your charge controller to the batteries. Again, match the positive and negative wires carefully. Once everything's hooked up, switch on the charge controller. It should indicate that it’s receiving energy from the solar panels. If you see a green light or a positive reading, you’re on the right track!
Finally, test your setup. Start by checking the voltage of your batteries with a multimeter. They should be charging and showing an increase in voltage over time. If you notice any issues, like the charge controller showing an error or the batteries not charging properly, double-check your connections. Following these steps makes it a breeze to figure out how to install solar panels on a truck camper and keep your adventures powered up!